A white background can make your photos look clean, professional, and ready for any use—whether you’re selling products, building a portfolio, or sharing pictures online. It’s a simple skill that anyone can learn, from photographers to small business owners to hobbyists. This guide will walk you through the steps to create a perfect white background using easy tools and techniques. With a white background, your subject pops, giving your images a polished and versatile look for websites, social media, or print.
In this article, we’ll cover why white backgrounds matter, the tools you need, how to set up and shoot your photos, and how to edit them for a flawless finish. We’ll keep it simple, using clear steps and tips that work for beginners and pros alike. Let’s dive in!
Why Use a White Background?
A white background does more than just look nice—it serves a purpose. Here’s why it’s a great choice:
- Focuses on the Subject: A white background removes distractions, making your subject—like a product or person—the star of the image.
- Looks Professional: Clean, white backgrounds give a high-quality, trustworthy vibe, perfect for businesses or portfolios.
- Versatile for Any Platform: White backgrounds blend seamlessly into websites, online stores, catalogs, or social media posts without clashing.
- Boosts Appeal: Products on white backgrounds often look more desirable, which can help with sales or engagement.
By using a white background, you create images that are flexible and eye-catching, no matter where they’re used.
The Power of Clean
I was helping my sister launch her handmade jewelry business, and her initial product photos were disasters – cluttered backgrounds, inconsistent lighting, amateur-looking shots that screamed “hobby” instead of “professional brand.”
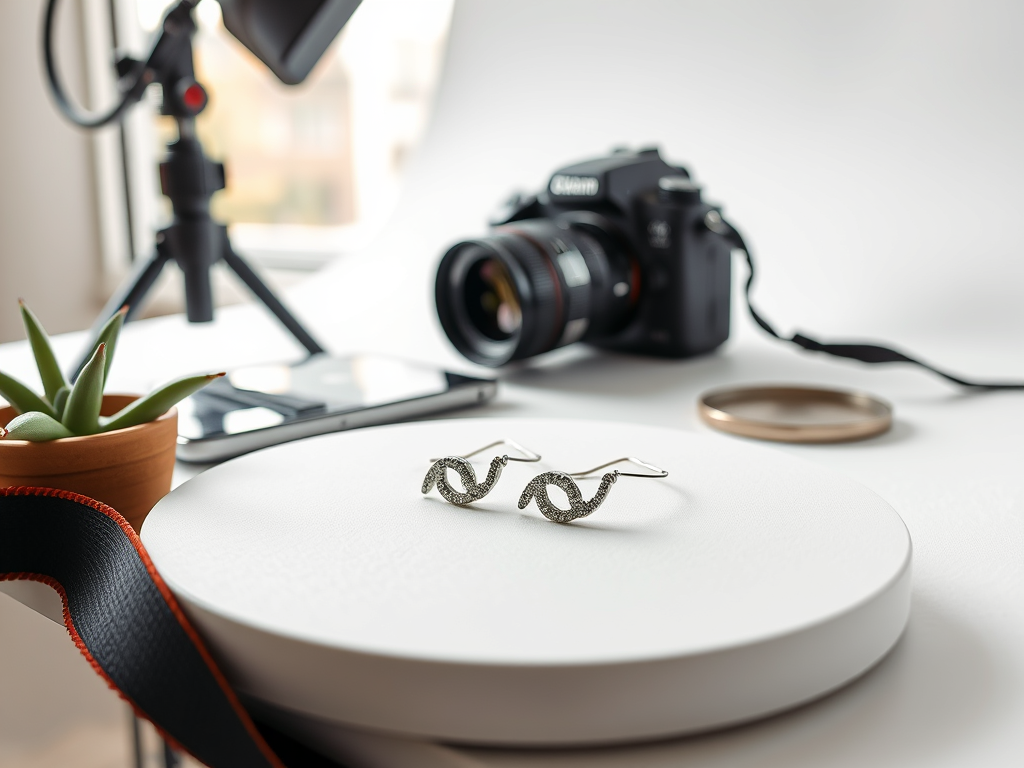
We set up a simple white backdrop using poster board and natural window light. The transformation was immediate. Her delicate silver earrings, previously lost against busy patterns, suddenly commanded attention. The clean white space made every detail pop – the hammered texture, the subtle gemstone sparkle, the precise wire work.
When she uploaded the new photos to Etsy, sales tripled within two weeks. Customers commented on how “professional” and “high-quality” the pieces looked. The white background eliminated distractions, letting buyers focus entirely on the craftsmanship.
More importantly, it gave her confidence. Those clean, professional images helped her see her work as legitimate business, not just a side hobby. She started charging appropriately for her time and skill, finally treating her artistry with the respect it deserved.
Tools You Need
You don’t need expensive gear to create a white background, but a few basic tools make the job easier. Here’s what you’ll need:
- Camera or Smartphone: A smartphone with a good camera (like one with HDR or portrait mode) works fine for most projects. For better control, a DSLR or mirrorless camera with manual settings is ideal.
- Lighting: Soft, even lighting is key to avoid shadows. Use natural light, studio lights, or a lightbox for consistent results.
- Backdrop: A white sheet, seamless paper, or professional backdrop works well. Make sure it’s smooth and clean.
- Editing Software: Programs like Adobe Photoshop, GIMP, or free apps like Snapseed let you fine-tune your photos. Online tools like Canva or Remove.bg are great for beginners.
These tools are affordable and easy to use, so you can start creating professional images without breaking the bank.
How to Take Photos with a White Background
Getting a white background starts with the right setup and shooting techniques. Follow these steps to capture great photos:
Step 1: Set Up Your Scene
- Choose a Backdrop: Pick a smooth, white backdrop like a sheet, paper roll, or professional backdrop. Avoid wrinkles or textures, as they show up in photos.
- Set Up Lighting: Use soft, even lighting to light both your subject and the background. Softboxes, ring lights, or natural light from a window work well. Position lights to avoid shadows.
- Adjust Camera Settings: Set your camera’s ISO, aperture, and shutter speed for proper exposure. Test a few shots to make sure the background looks bright but not overexposed.
The Living Room Studio
For my friend’s headshots, I transformed my living room into a makeshift studio. I hung a white bedsheet against the wall as backdrop, securing it with thumbtacks and smoothing out wrinkles.
The key light was a large window to the left, diffused by sheer curtains for soft, even illumination. I positioned a white foam board opposite the window as a fill light, bouncing light back to eliminate harsh shadows on the right side of her face.
For the rim light, I used a desk lamp with daylight bulbs behind her, slightly elevated and angled down to create subtle hair separation from the background. The camera sat on a tripod at eye level, about six feet away.
The setup cost under $30 but produced professional-looking results. The soft window light created flattering skin tones, while the bounced fill light maintained detail in the shadows. Multiple LinkedIn connections complimented her new professional photos, leading to several job interviews.
Step 2: Take the Photo
- Use a Tripod: A tripod keeps your camera steady, ensuring sharp images, especially in low light or with longer exposures.
- Position Your Subject: Place your subject in front of the backdrop, leaving enough space to avoid shadows or cropping issues.
- Take Multiple Shots: Shoot from different angles and distances. This gives you options when editing and helps you find the best perspective.
Taking time to get the shot right reduces the work needed in editing later.
Editing Photos for a Perfect White Background
Editing is where the magic happens. Even if your photo doesn’t have a perfect white background straight from the camera, editing tools can help you achieve that clean look. Here’s how to do it:
Using Adobe Photoshop
Photoshop is a powerful tool for creating white backgrounds. Follow these steps:
- Open Your Image: Load your photo into Photoshop.
- Select the Subject: Use the Quick Selection Tool or Magic Wand Tool to outline your subject. Zoom in for accuracy.
- Refine the Edges: Go to Select > Modify > Feather to soften the edges of your selection for a natural look.
- Add a Layer Mask: Click the Layer Mask icon to separate your subject from the background. This keeps your original image safe.
- Create a White Layer: Add a new layer below your subject and fill it with white using the Paint Bucket Tool.
- Adjust Brightness: Use Image > Adjustments > Levels to make the background pure white without affecting the subject.
Photoshop is worth the investment for users who need advanced editing capabilities, precision, and flexibility—especially for professionals in photography, design, or e-commerce. Its powerful tools like layer masking, content-aware fill, and batch processing save time and ensure high-quality results, particularly when handling complex images or large volumes.
However, for simpler tasks like creating white backgrounds for product shots or social media content, free or low-cost tools like Canva, Remove.bg, or even mobile apps may be enough. These tools are user-friendly and often deliver quick results with minimal effort, ideal for beginners or those with basic needs. Ultimately, the choice depends on your editing goals, budget, and how frequently you work with images.
Using Free Online Tools
If Photoshop feels overwhelming or you don’t want to pay for software, try these free tools:
- Remove.bg: Upload your photo, and this tool automatically removes the background. You can then add a white background with one click.
- Canva: Canva’s free background remover is easy to use, and you can add a white background or design elements for a complete project.
- PhotoScissors: This tool lets you manually or automatically cut out the background and replace it with white.
These tools are beginner-friendly and perfect for quick edits, especially for small businesses or casual users.
Using AI Tools
AI-powered tools make creating white backgrounds even easier by automating the process:
- Luminar AI or Adobe Sensei: These tools use AI to detect and remove backgrounds with minimal effort. They’re great for complex images.
- White Background Generators: Tools like Pixelcut or Fotor let you upload an image and instantly swap the background for white.
AI tools save time, especially if you’re editing lots of photos, like for an online store.
I once needed to remove backgrounds from over 50 product photos for an online store launch—on a tight deadline. Instead of manually editing each image in Photoshop, I used an AI background remover online. In minutes, it processed all the images with impressive accuracy. I only had to make a few quick adjustments, and the rest were ready to upload. What would’ve taken me several hours was done in under 30 minutes. The final product looked clean and professional, and I was able to focus my time on other launch tasks like writing product descriptions and setting up the site. It was a game-changer.
Tips for the Best Results
To get a flawless white background, keep these tips in mind:
- Use Consistent Lighting: Even lighting prevents shadows and makes editing easier. Invest in softboxes or ring lights for the best results.
- Shoot in High Resolution: High-resolution images give you more detail to work with, ensuring crisp results after editing.
- Keep the Background Clean: Avoid objects, textures, or colors in the background that could distract from the white look.
- Practice Editing: The more you practice with editing tools, the faster and better you’ll get at creating perfect white backgrounds.
These small details can make a big difference in the final image.
Saving and Using Your Images
Once your photo has a perfect white background, save it correctly to maintain quality:
- Choose the Right Format: Save as PNG for transparency (great for logos or overlays) or JPEG for smaller file sizes (ideal for web use).
- Keep High Resolution: Save at the highest resolution needed for your project, whether it’s for print (300 DPI) or web (72 DPI).
- Organize Your Files: Name your files clearly and store them in folders to find them easily later.
Proper saving ensures your images look great wherever you use them, from online stores to social media.
Conclusion
Creating a white image background is a simple way to make your photos look professional and versatile. Whether you’re using a smartphone, a camera, or editing tools like Photoshop or free online apps, the process is straightforward with practice. By setting up your shoot carefully, using the right lighting, and editing with precision, you can achieve a clean, white background that makes your subject shine.
Start experimenting with these steps today, and you’ll soon be creating stunning images that stand out for any purpose. With a little effort, you’ll master this skill and elevate your photography game!
Leave a Reply